To edit the text in the left column, highlight and select the text and either type or paste in from a plain text editor. Do not paste from Word or a rich text editor as the formatting may be inserted. To insert a link in the right hand column, click in an empty space and use the Link Builder tool accessed from the editor toolbar. Links will automatically format. To change or replace the image, right click and select replace image from the context menu. Highlight and select the image caption to change or delete the text.
Creating a Google Album in an Apple mobile device
Bill Graham
Ashby Village Technology Volunteer
You
can share photos in a Google Photos album with family and friends
regardless of what device or operating system they use. Google albums
are a great way to share your vacation pictures in real time with
those who can’t be with you!
Now
let’s create your album.
Install the
Google Photos app:
Download the free Google Photos app & open it. If you’ve
got photos in Apple Photo, they will appear in Google Photos.
|
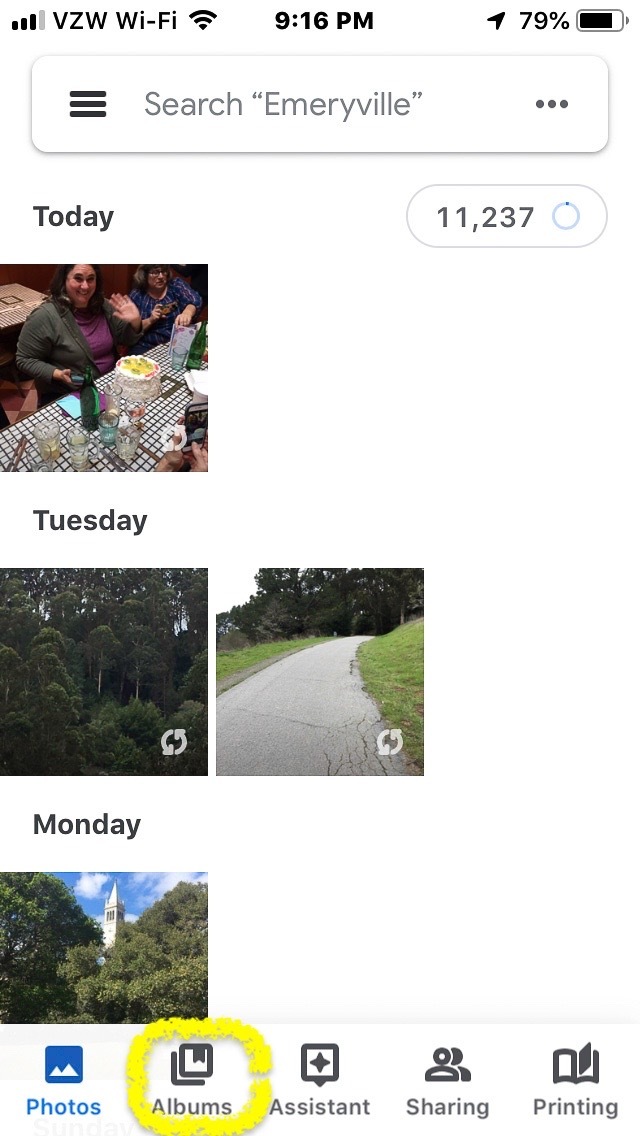
1. Create
a new album:
At the bottom of your screen, tap “Albums.”
|
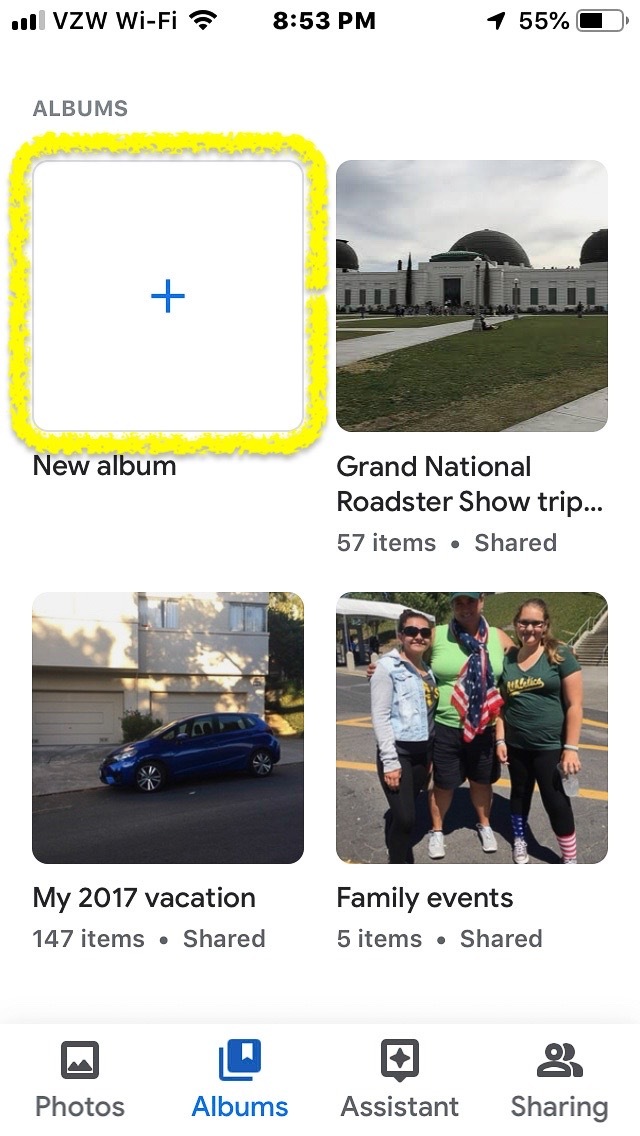
2. On
the next screen, tap the +
in the “New album” square.
|
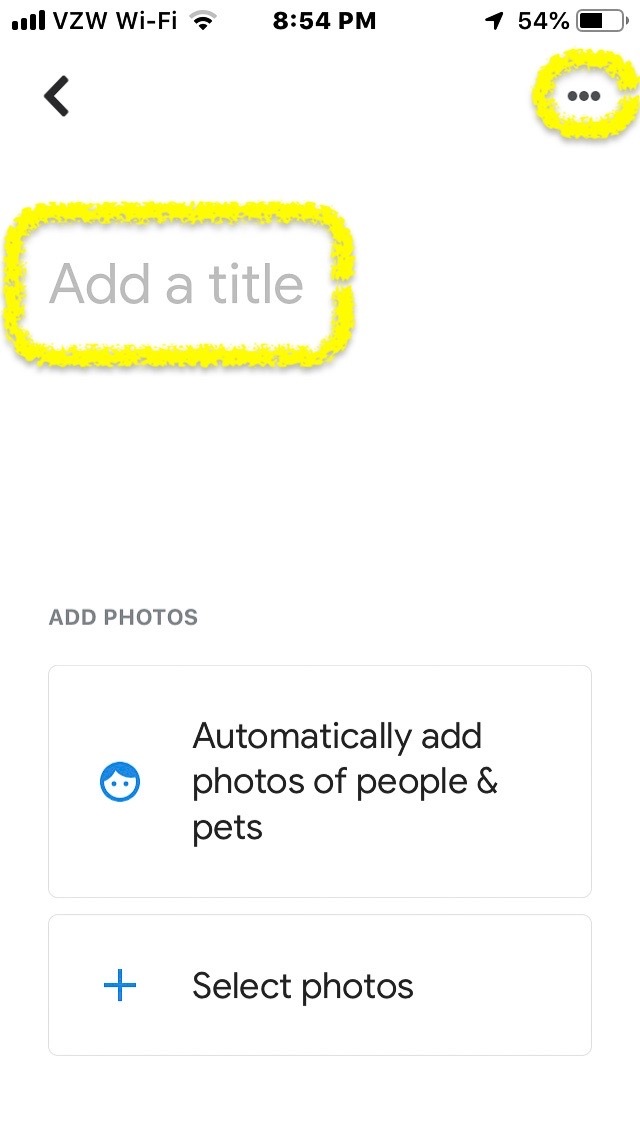
3. In
the new screen, tap “Add a Title,” type your title,
and click “Done.”
Then,
to set
up album sharing,
tap the row of dots in upper right of screen
|
|
|
|
|
|
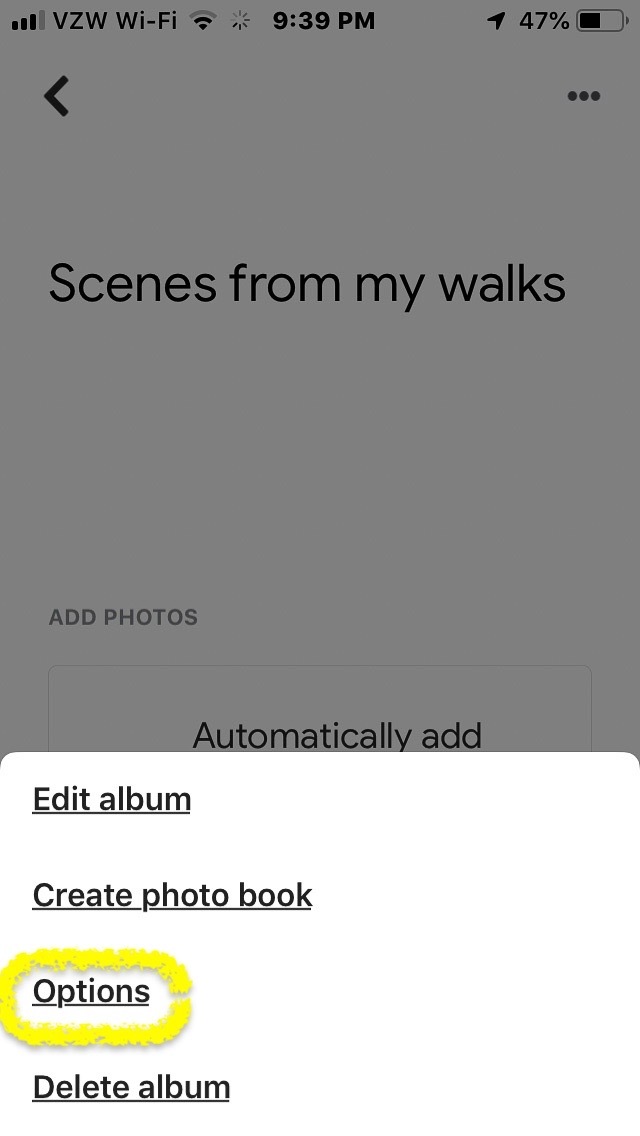
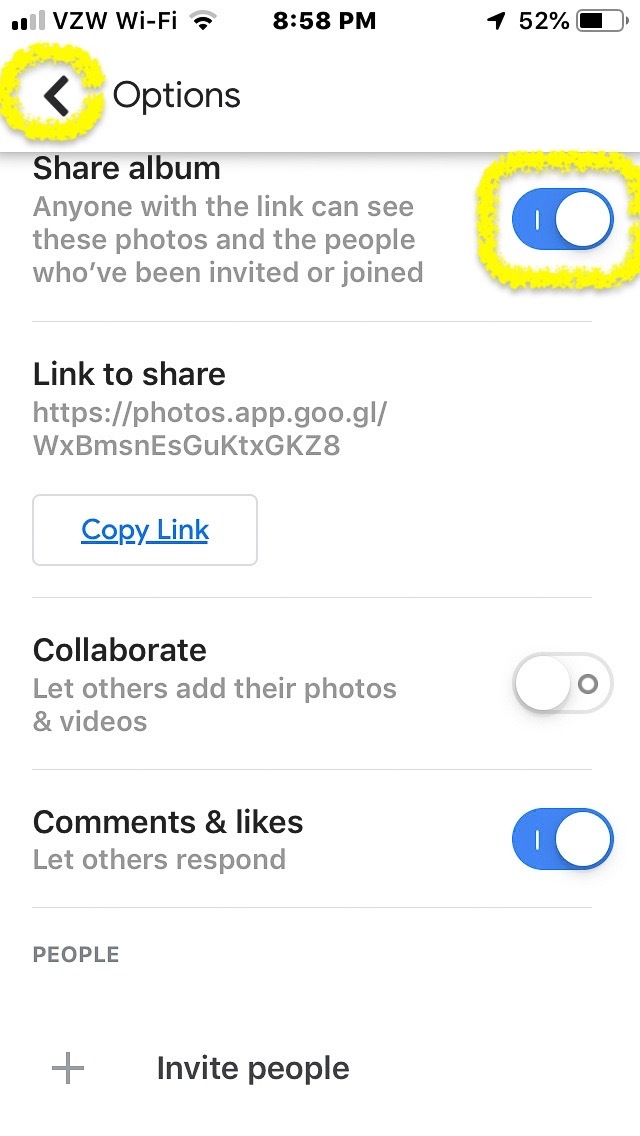
4. On
the next screen, tap “Options.”
|
5. On
the Options screen, slide the “Share album” switch to
the right to turn on this option.
|
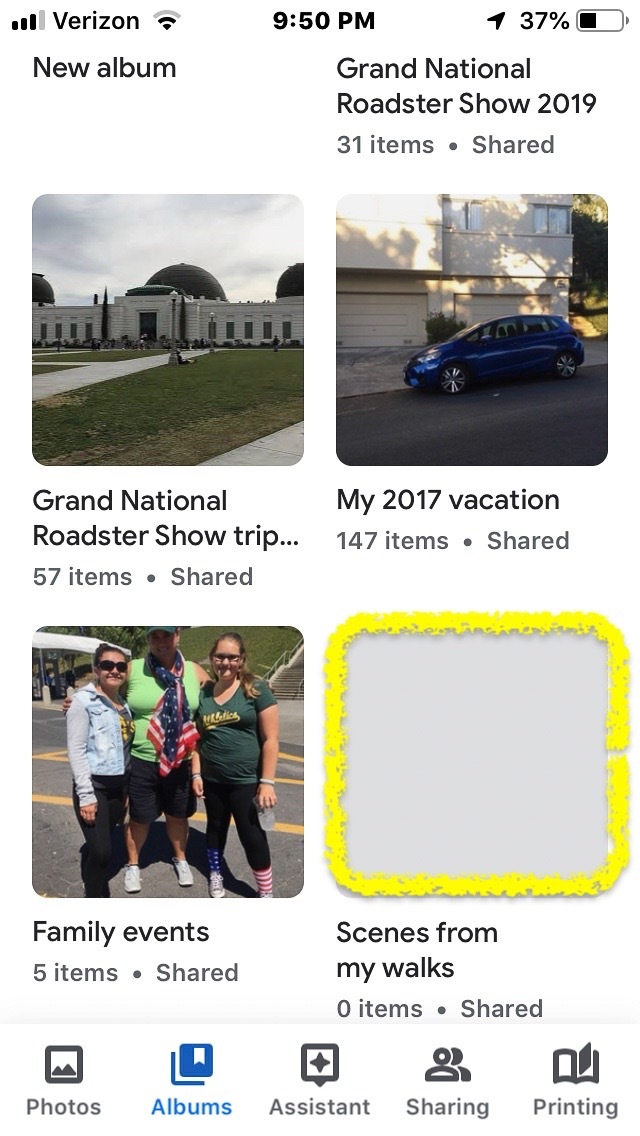
6. Then
tap the left pointing arrow (<) in the upper left corner twice
to return to your albums.
Add
photos to your album: Tap the gray square labeled with your album
title.
|
|
|
|
|
|
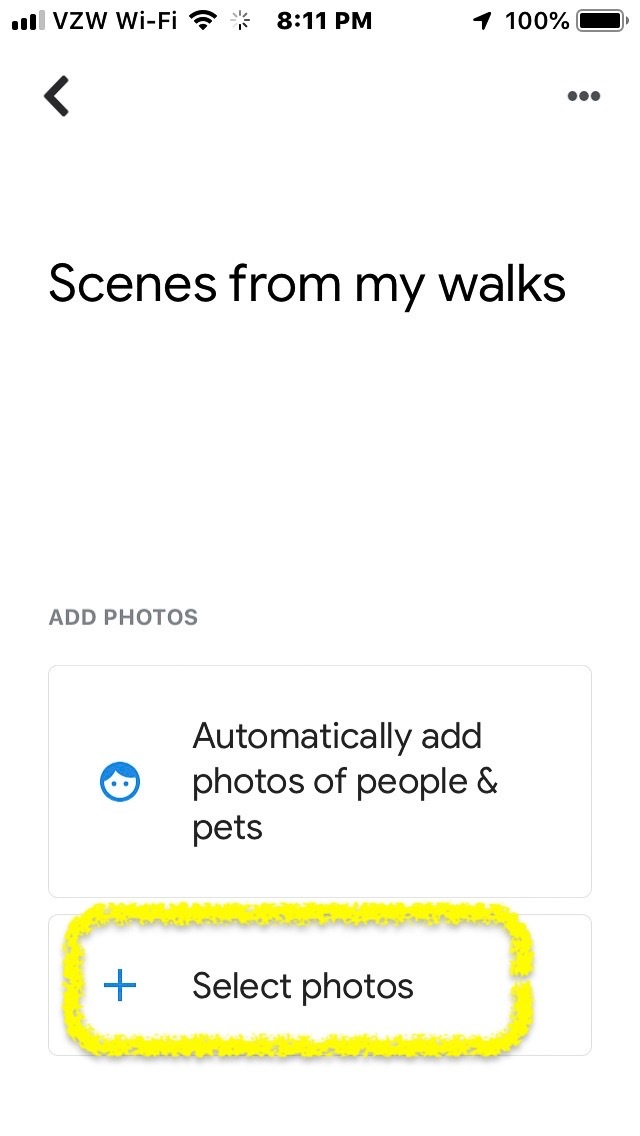
7. Tap
“Select photos” at the bottom of your screen.
|
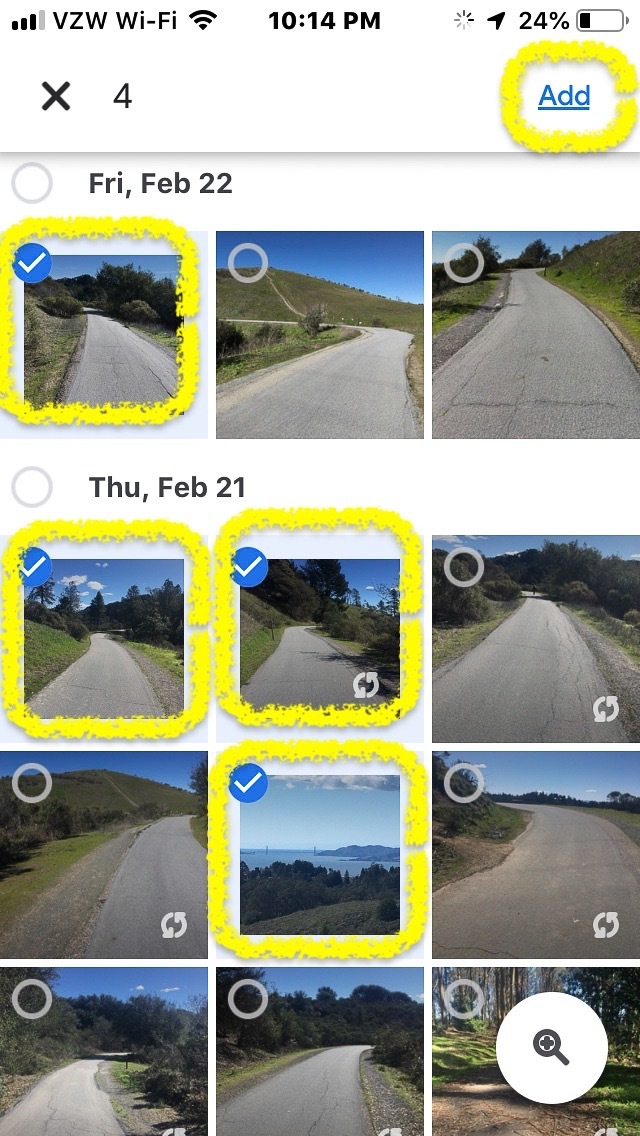
8. Tap
each photo you want to add to your album. A check mark will show
which photos you’ve selected.
|
9. Then
tap “Add” at the top right of your screen to move them
to your album.
|
|
|
|
|
|
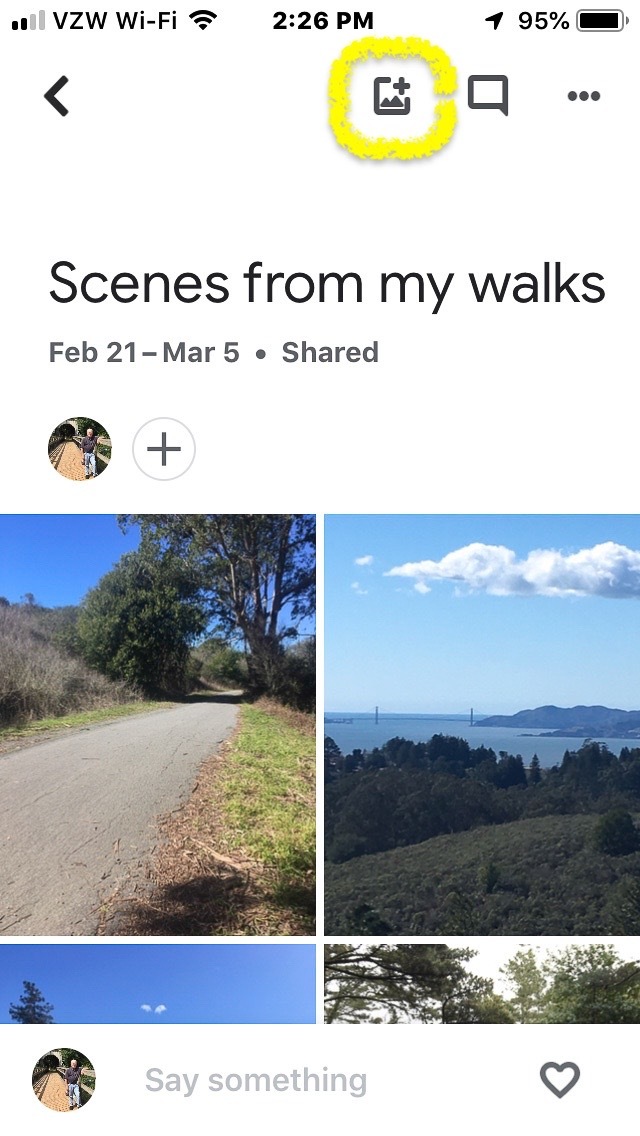
10.
Share your album. Tap the “+” sign above the top left
photo in your album.
|
11.
You will then see a list of your contacts. [This
screen is not illustrated to protect privacy.]
|
12. Tap
the name of a person with whom you want to share your album, and
you will see a colored circle with the first letter of the first
name of that person. If you want to share with more than one
person, tap the name of each person with whom you’d like to
share.
|
|
13.
After you’ve included everyone you want to share with, tap
“Send” in the upper right corner of the screen.
|
14.
Then tap the “X” in the upper left of the screen.
|
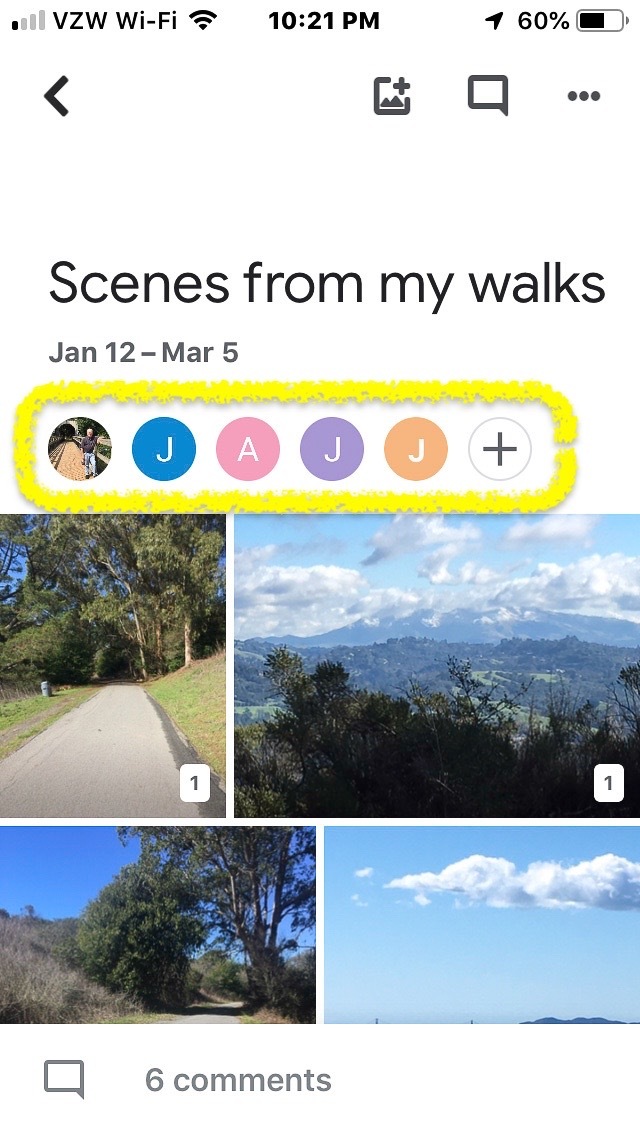
15.
Just above the photos in your album, you will now see the first
letter of the first name of each person with whom you shared.
|
Congratulations!
You’ve created a Google photo album complete with a first set
of photos and links to the people with whom you want to share it.
Ask
the author
If
you have questions, email Bill at wdgraham@pacbell.net.
Let
us assist you
Ashby
Village Technology volunteers are available to help you with Google
photo albums. To request assistance, contact the office at
volunteer@ashbyvillage.org
or (510) 204-9200.